Professional Repair and
Shop Operation Class
Tuesday, December 6, 2005
Headsets, Handlebars, and Headsets
Previous | NextAnna was our first instructor on Tuesday when we discussed stems, handlebars, headsets, and rigid forks.
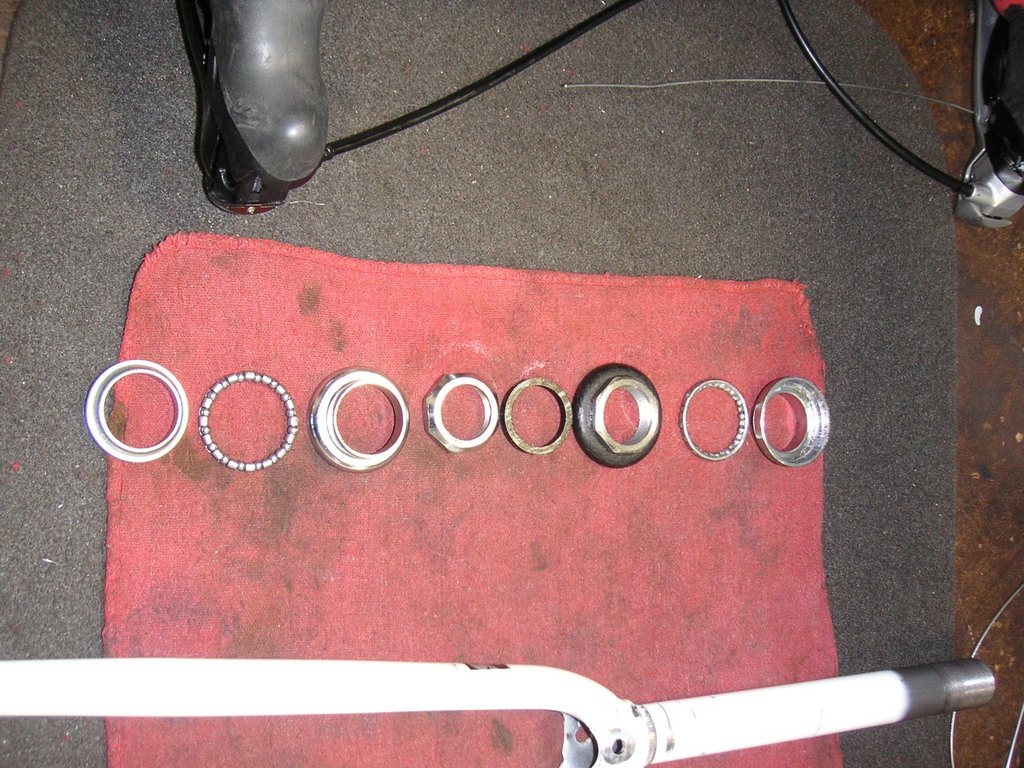 |
| Headset parts |
These newer, larger tubes use stems that are clamped onto the steerer tube, not threaded. Threads cause the tube to be narrower and weaker, so the larger tubes are also stronger than the narrower, threaded tubes. The threadless stems are not very adjustable and I've always wondered why they are now used on almost all bikes, mountain and road. With a quill stem and expandable bolt, the stem height is easily adjustable. On the threadless stems, once the tube is cut, the only way to adjust the height is to use a new stem with a steeper angle, new handlebars, or to use a stem that rotates at the handlebar. There is a cost to all of these solutions.
We spent some time on figuring out how to replace a headset.
 |
| Headset |
We learned how to use the tools required to remove existing headset cups that have been pressed into the head tube. Then we learned how to press new cups back into the head tube, ensuring that they are parallel and tightly fitted into the tube.
After class we were able to work in the open lab again. Earlier in the day I ordered a replacement bottom bracket for my Bike Friday. United Bicycle Parts is a supplier located nearby, so we received the parts by the afternoon session. Replacing the bottom bracket was relatively easy, loosening the non-drive side splined cub (left loose), loosening the drive side splined fitting (right loose), which is attached to the cartridge bottom bracket. The process is reversed for the installation. The key is to ensure that the replacement BB contains the correct threads, is the correct width, and contains the proper axle.
That evening I began to study for the certification exam on Friday. It was a challenge, as not many in our unit studied at night; they are young and probably retained most of the info discussed during the day. I seem to have become memory-challenged and needed to study. I didn't believe, as one of my roomates did, that "studying is cheating". Previous | Next